pipeline {
agent any
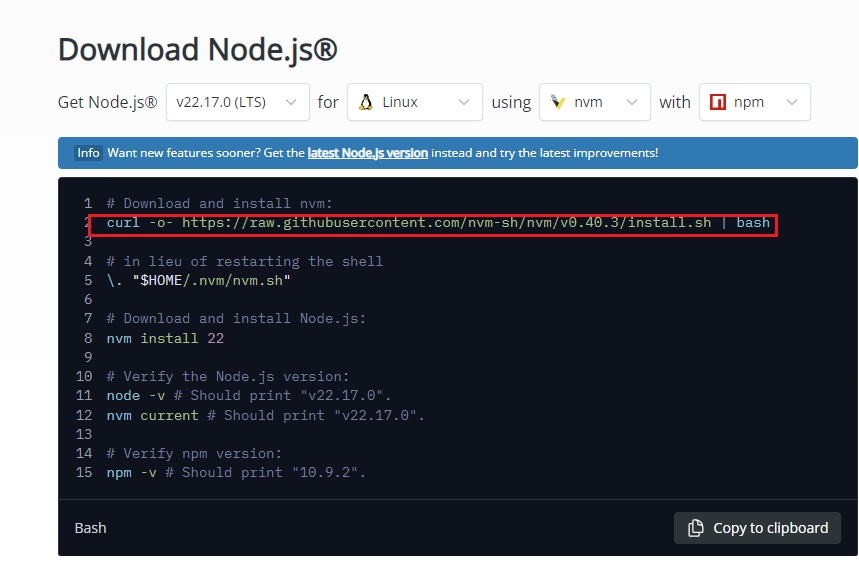
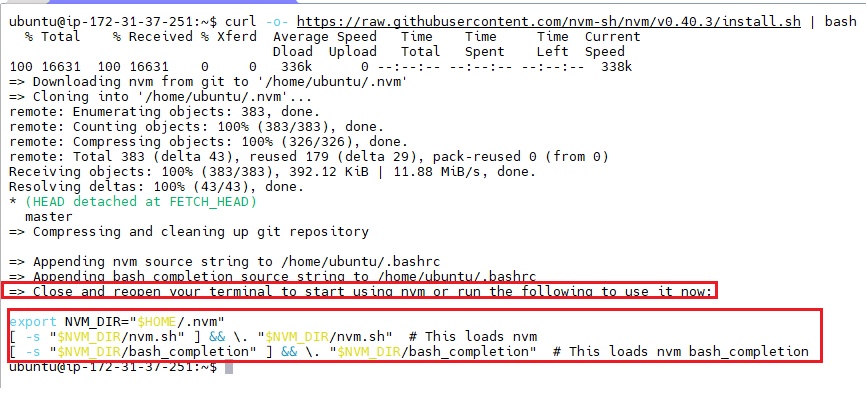
tools {
nodejs 'nodejs23'
}
environment {
SCANNER_HOME = tool 'sonar-scanner'
}
stages {
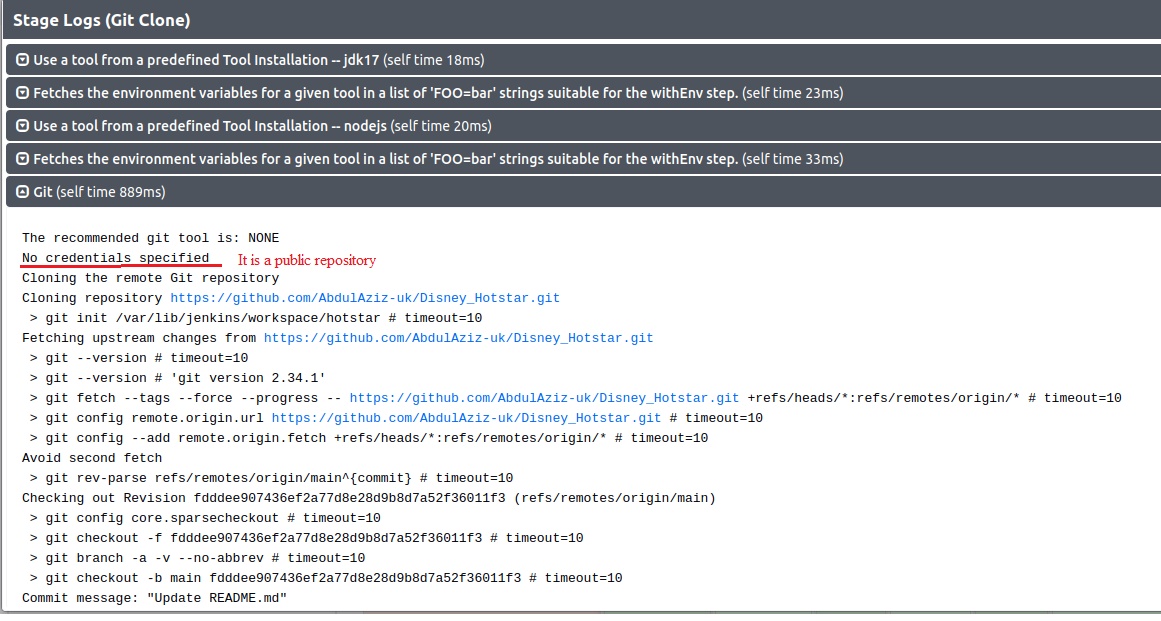
stage('Git Checkout') {
steps {
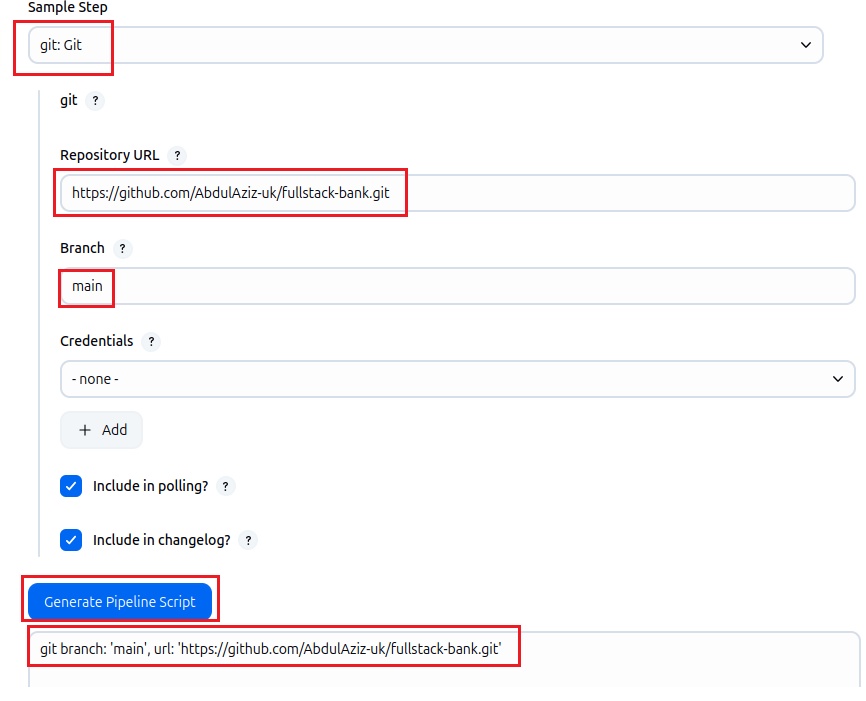
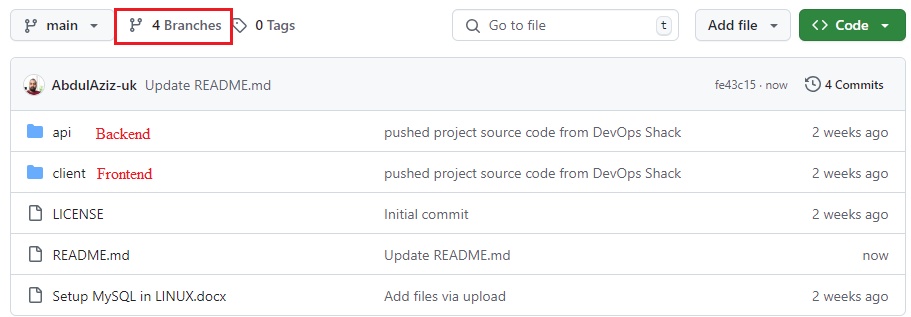
git branch: 'main', url: 'https://github.com/jaiswaladi246/3-Tier-DevSecOps-Mega-Project.git'
}
}
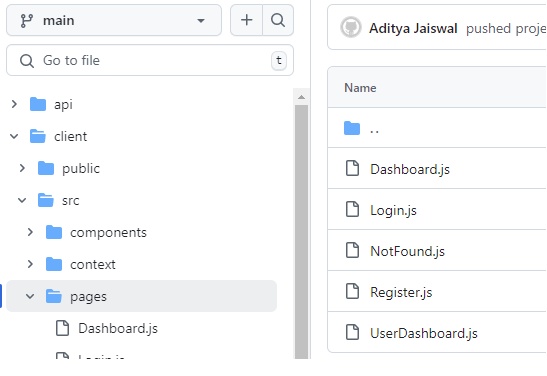
stage('Frontend Compilation') {
steps {
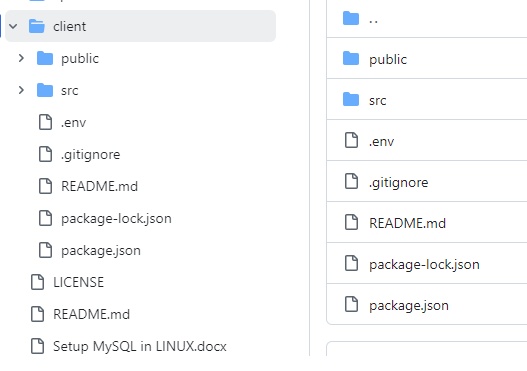
dir('client') {
sh 'find . -name "*.js" -exec node --check {} +'
}
}
}
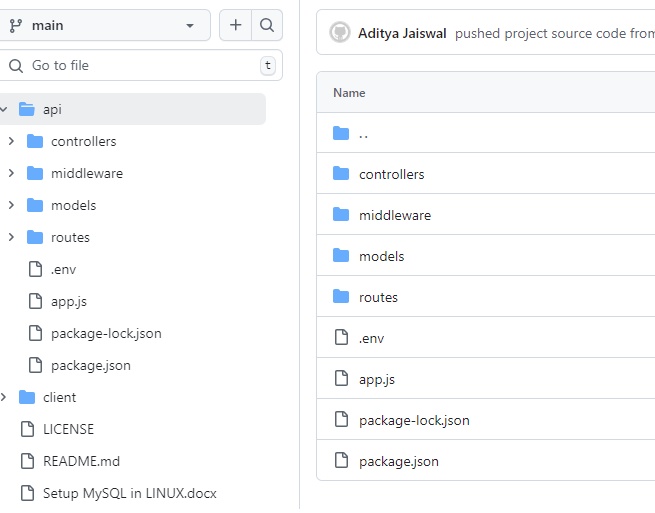
stage('Backend Compilation') {
steps {
dir('api') {
sh 'find . -name "*.js" -exec node --check {} +'
}
}
}
stage('GitLeaks Scan') {
steps {
sh 'gitleaks detect --source ./client --exit-code 1'
sh 'gitleaks detect --source ./api --exit-code 1'
}
}
stage('SonarQube Analysis') {
steps {
withSonarQubeEnv('sonar') {
sh ''' $SCANNER_HOME/bin/sonar-scanner -Dsonar.projectName=NodeJS-Project \
-Dsonar.projectKey=NodeJS-Project '''
}
}
}
stage('Quality Gate Check') {
steps {
timeout(time: 1, unit: 'HOURS') {
waitForQualityGate abortPipeline: false, credentialsId: 'sonar-token'
}
}
}
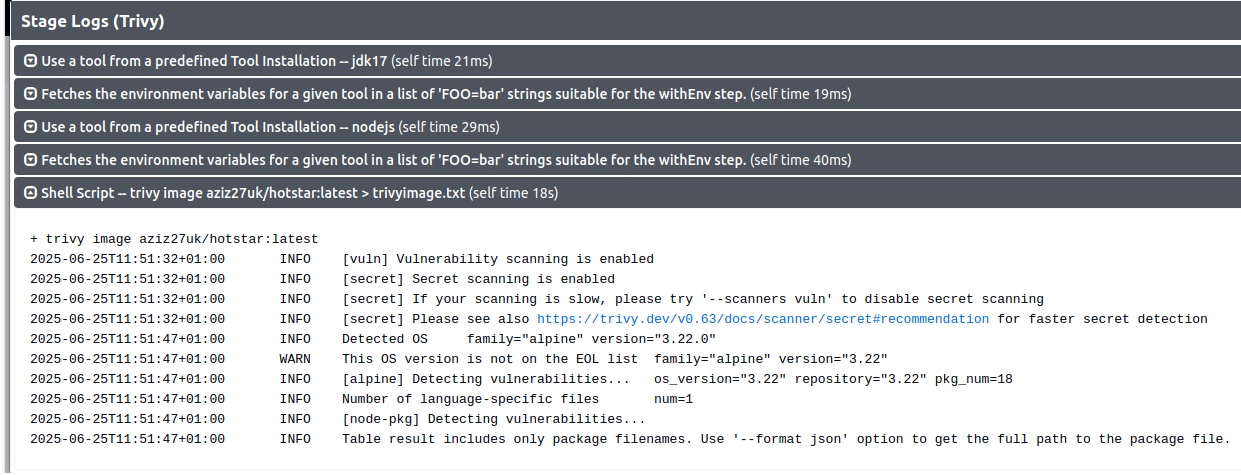
stage('Trivy FS Scan') {
steps {
sh 'trivy fs --format table -o fs-report.html .'
}
}
stage('Build-Tag & Push Backend Docker Image') {
steps {
script {
withDockerRegistry(credentialsId: 'docker-cred') {
dir('api') {
sh 'docker build -t adijaiswal/backend:latest .'
sh 'trivy image --format table -o backend-image-report.html adijaiswal/backend:latest '
sh 'docker push adijaiswal/backend:latest'
}
}
}
}
}
stage('Build-Tag & Push Frontend Docker Image') {
steps {
script {
withDockerRegistry(credentialsId: 'docker-cred') {
dir('client') {
sh 'docker build -t adijaiswal/frontend:latest .'
sh 'trivy image --format table -o frontend-image-report.html adijaiswal/frontend:latest '
sh 'docker push adijaiswal/frontend:latest'
}
}
}
}
}
stage('Manual Approval for Production') {
steps {
timeout(time: 1, unit: 'HOURS') {
input message: 'Approve deployment to PRODUCTION?', ok: 'Deploy'
}
}
}
stage('Deployment To Prod') {
steps {
script {
withKubeConfig(caCertificate: '', clusterName: 'devopsshack-cluster', contextName: '', credentialsId: 'k8-prod-token', namespace: 'prod', restrictKubeConfigAccess: false, serverUrl: 'https://AFC6FCFF5360B30D5E8950396E38A8C4.gr7.ap-south-1.eks.amazonaws.com') {
sh 'kubectl apply -f k8s-prod/sc.yaml'
sleep 20
sh 'kubectl apply -f k8s-prod/mysql.yaml -n prod'
sh 'kubectl apply -f k8s-prod/backend.yaml -n prod'
sh 'kubectl apply -f k8s-prod/frontend.yaml -n prod'
sh 'kubectl apply -f k8s-prod/ci.yaml'
sh 'kubectl apply -f k8s-prod/ingress.yaml -n prod'
sleep 30
}
}
}
}
stage('Verify Deployment To Prod') {
steps {
script {
withKubeConfig(caCertificate: '', clusterName: 'devopsshack-cluster', contextName: '', credentialsId: 'k8-prod-token', namespace: 'prod', restrictKubeConfigAccess: false, serverUrl: 'https://AFC6FCFF5360B30D5E8950396E38A8C4.gr7.ap-south-1.eks.amazonaws.com') {
sh 'kubectl get pods -n prod'
sleep 20
sh 'kubectl get ingress -n prod'
}
}
}
}
}
}
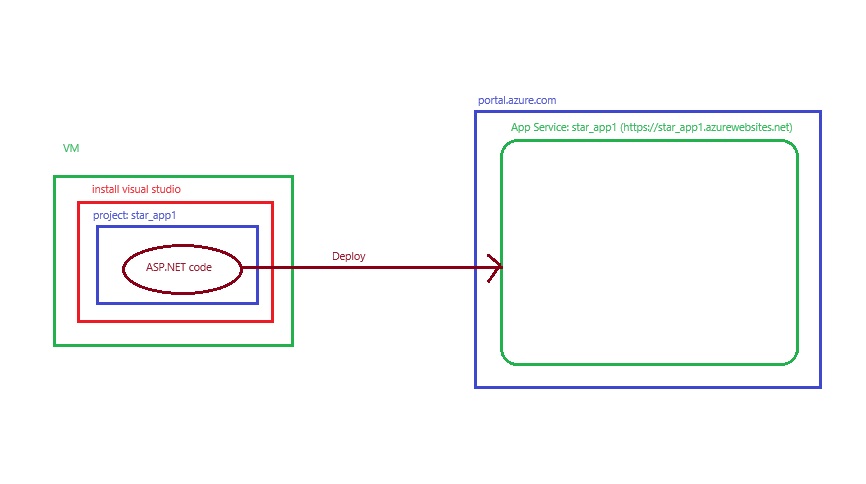
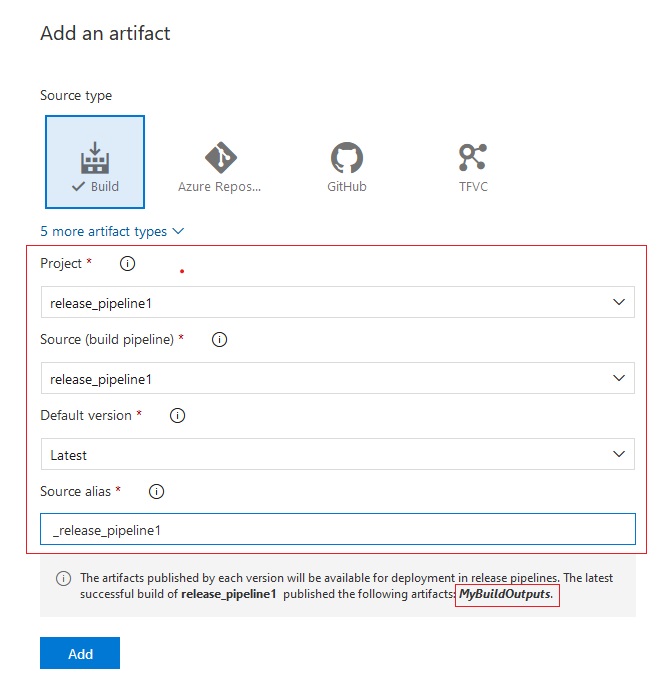
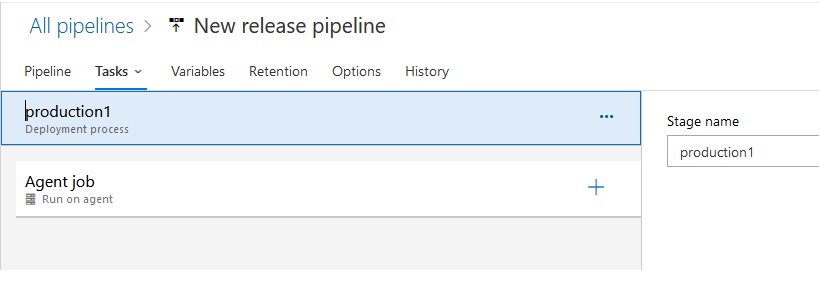
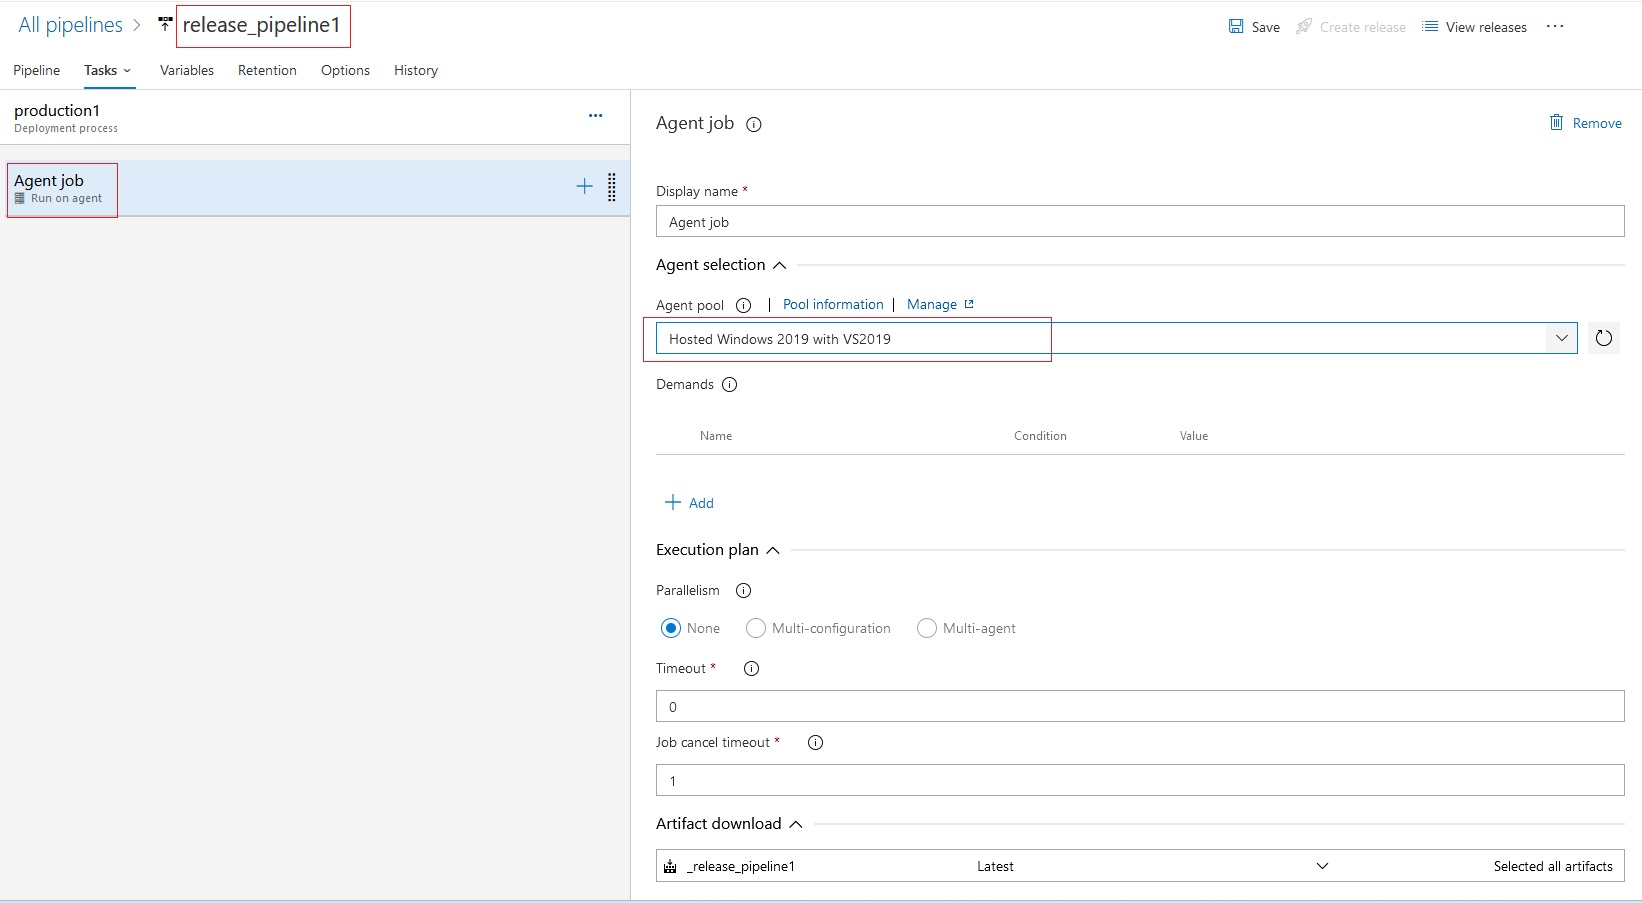
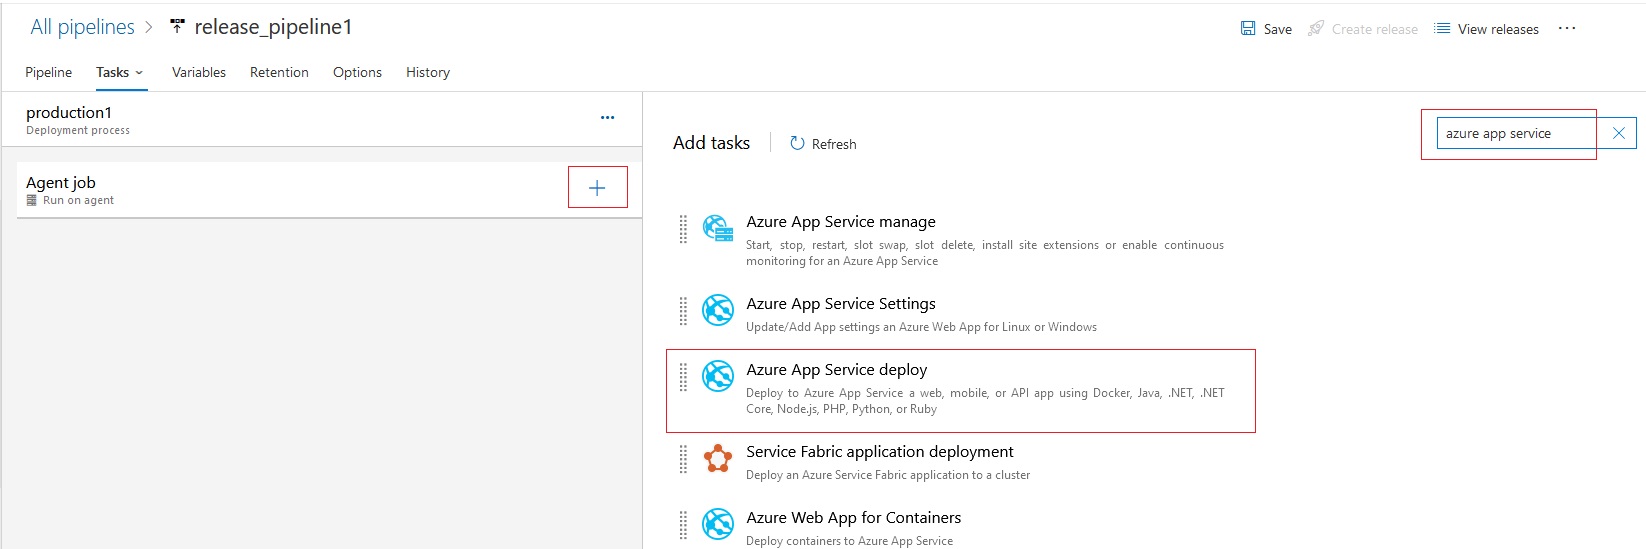
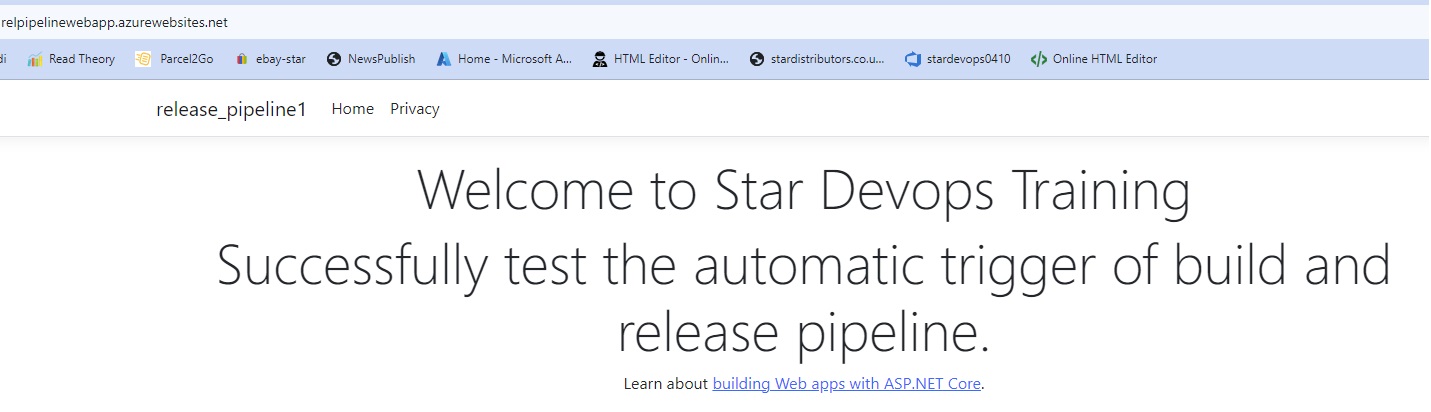
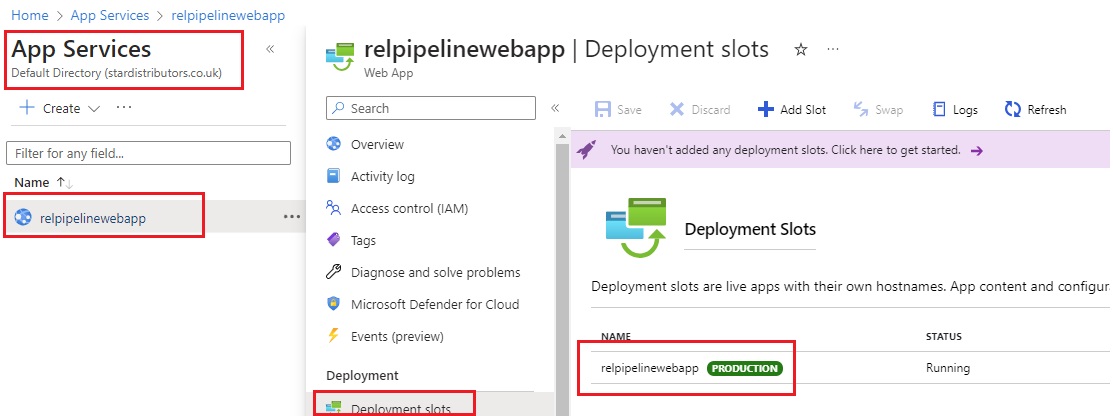
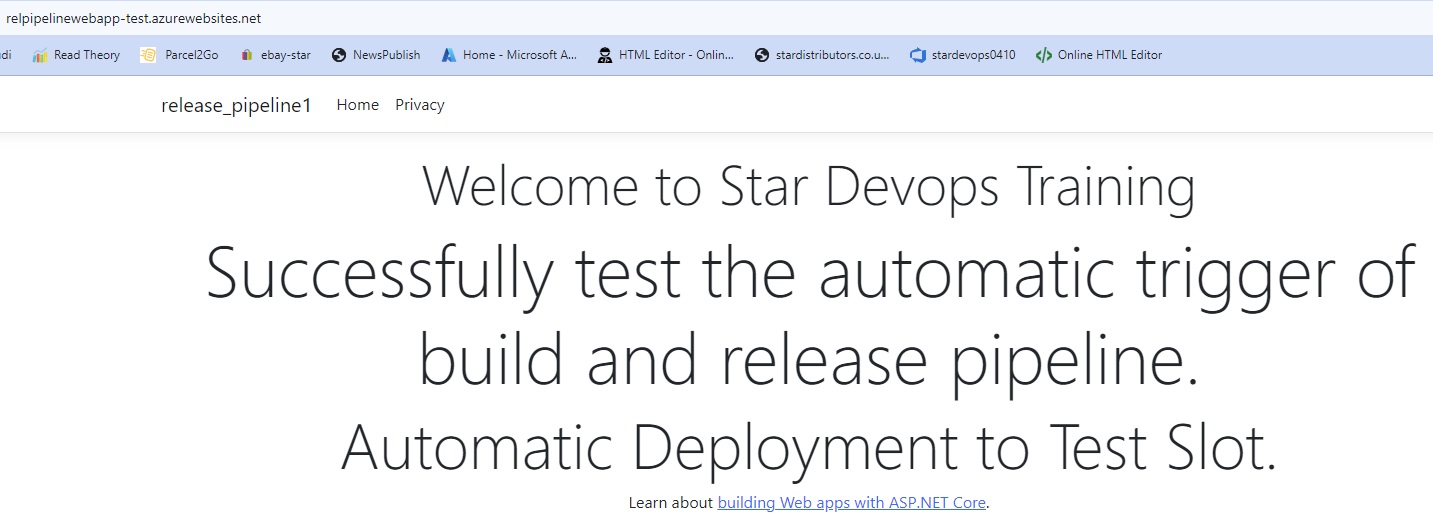
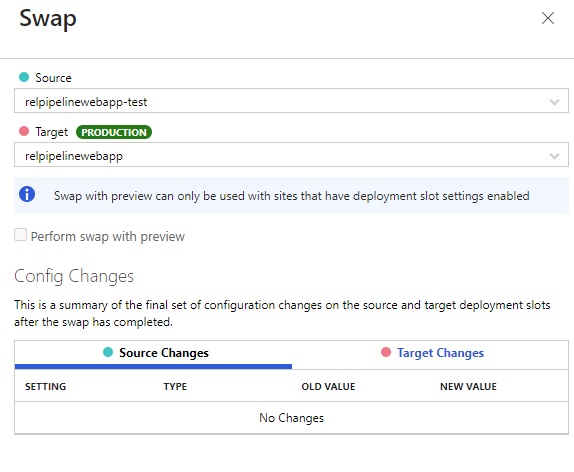
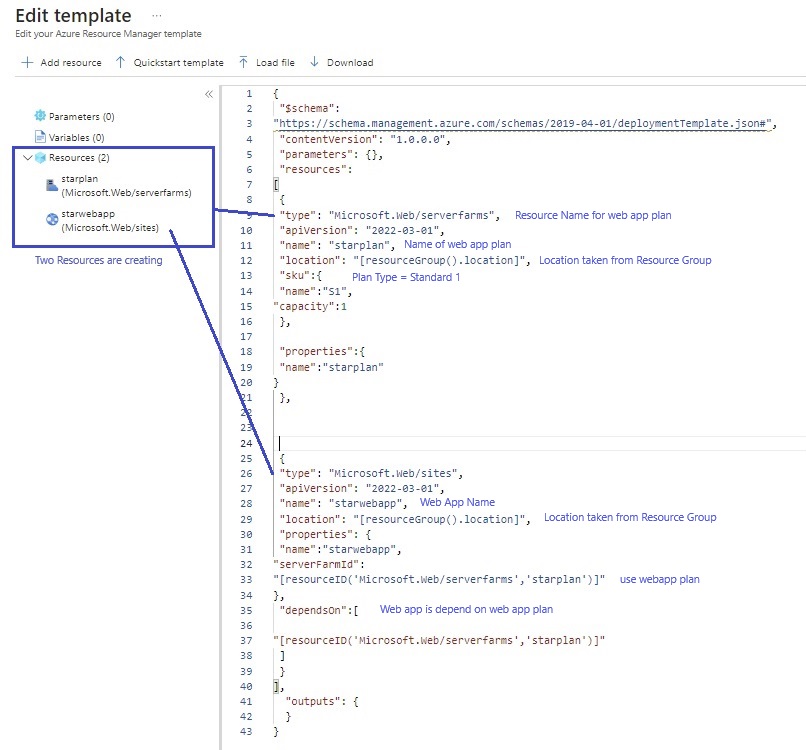
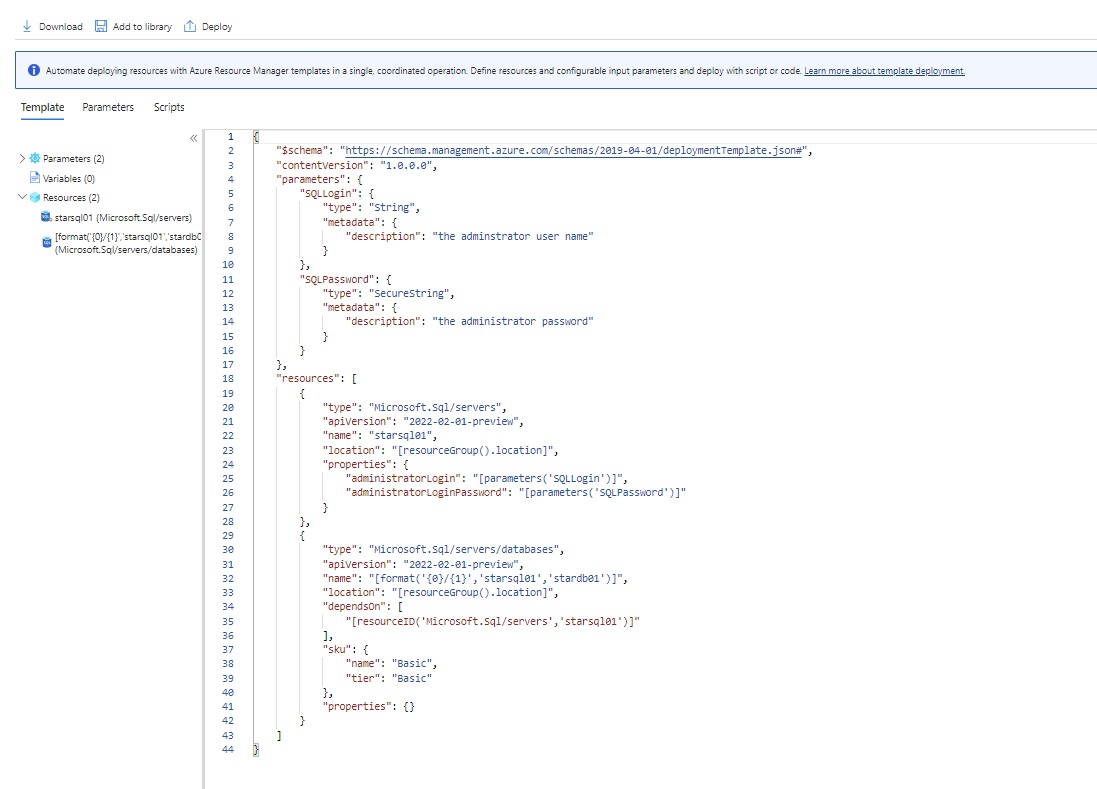
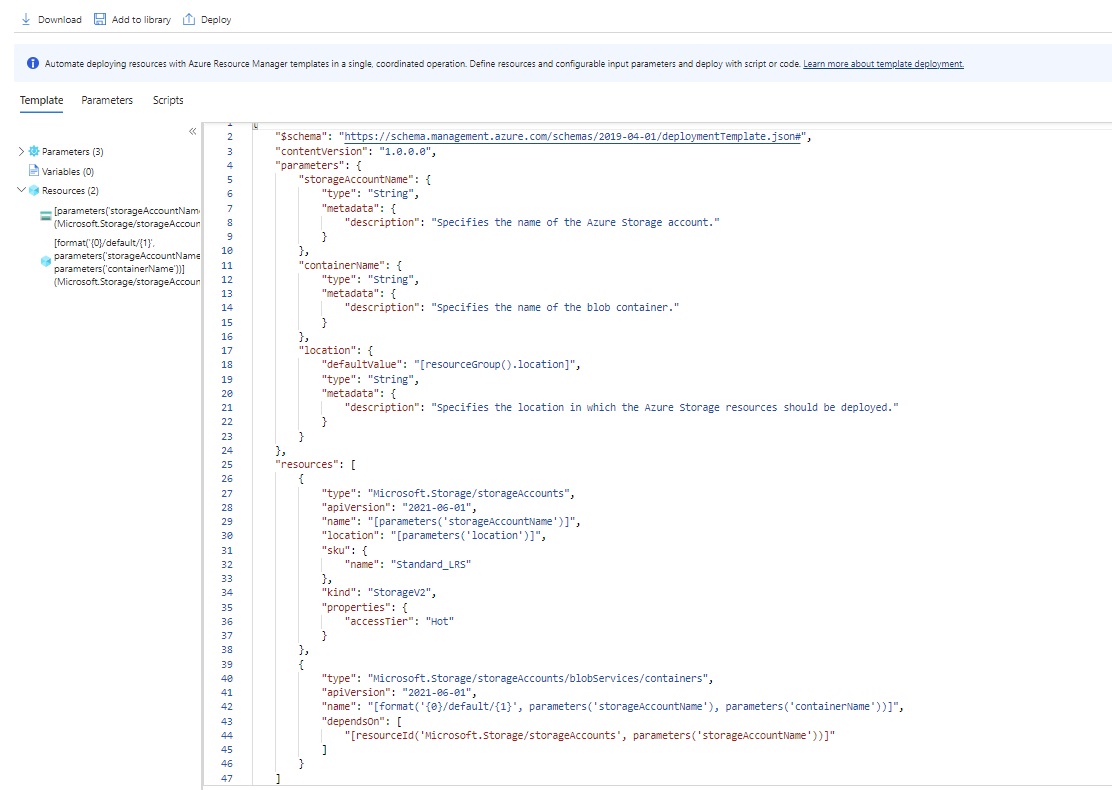
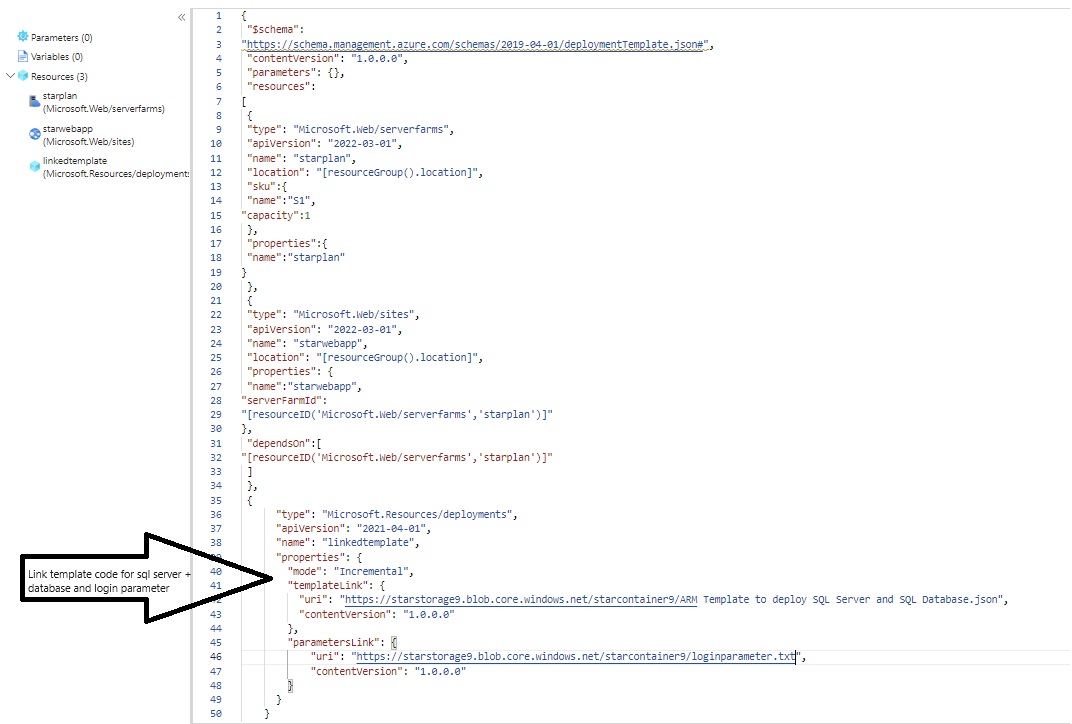
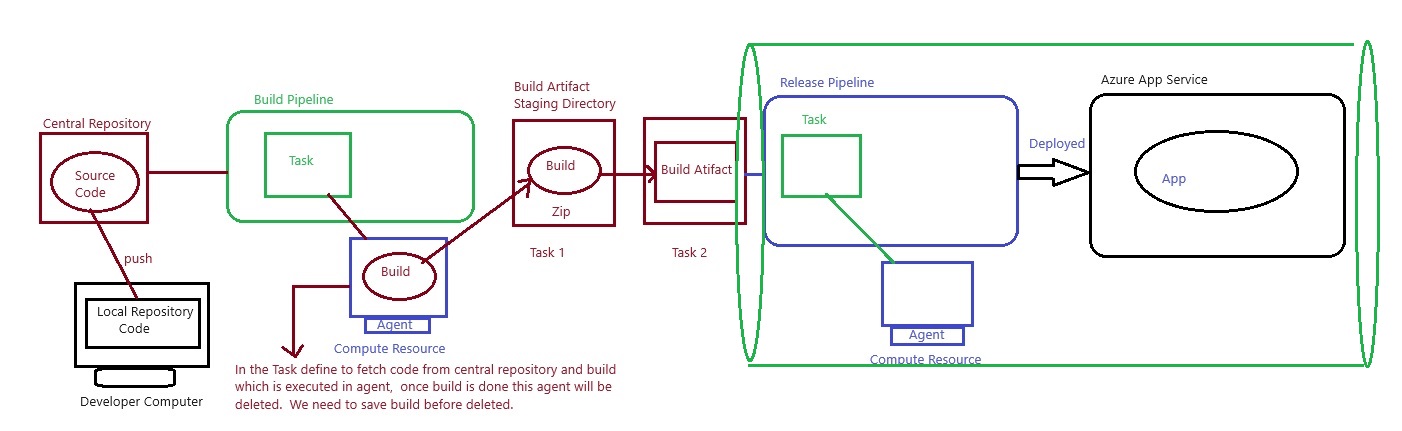
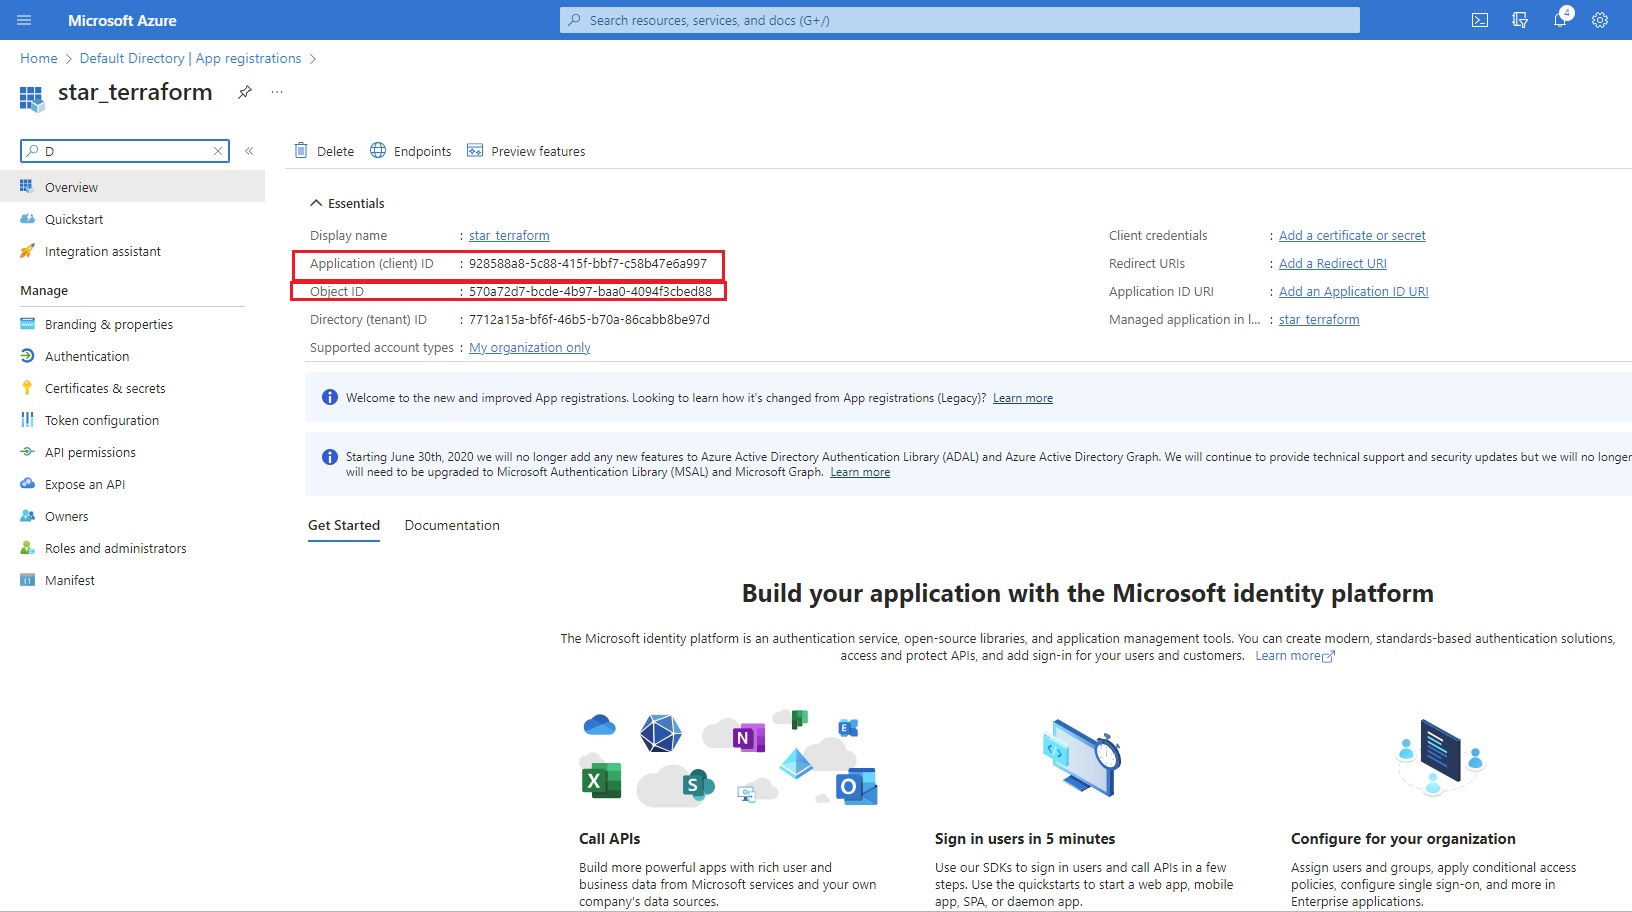
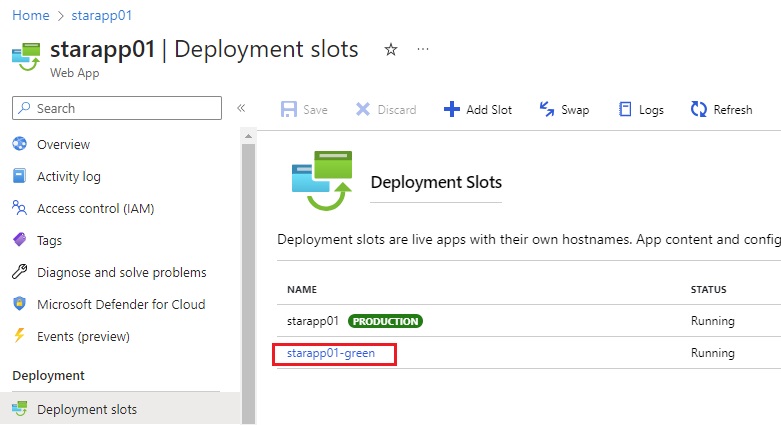
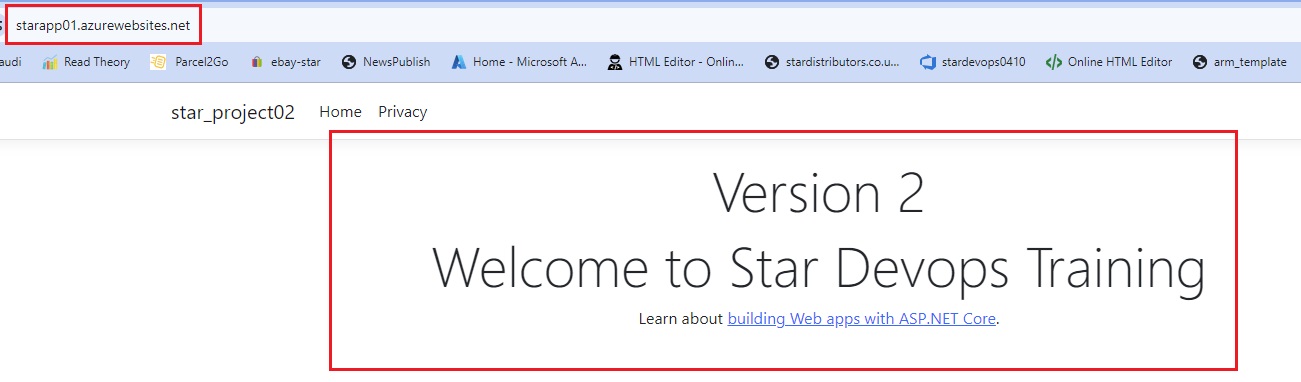
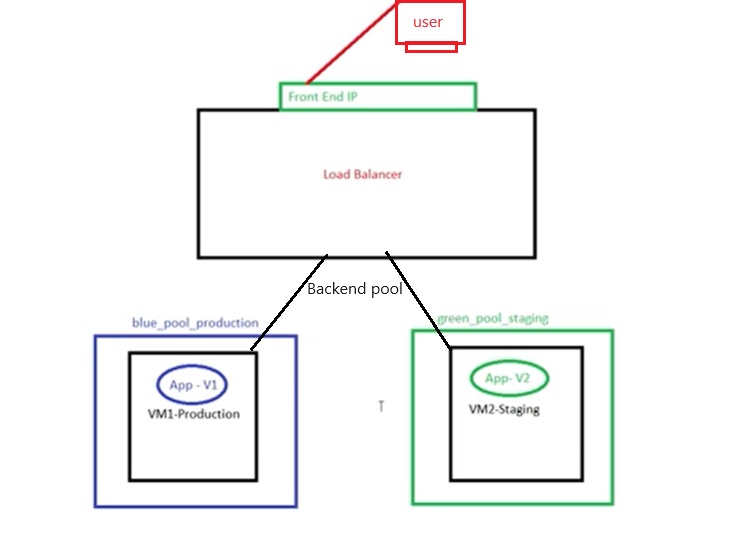
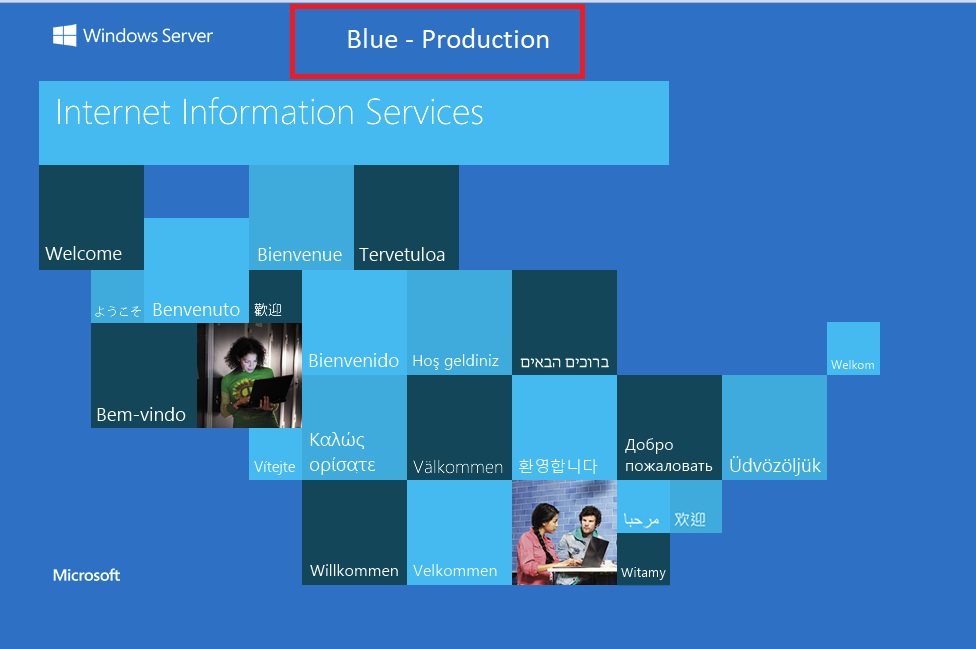
 Azue Deployment Environments